

Your backdrop is like your opening line. It sets the tone before you say a word. It’s not just about colors or furniture; it’s about your brand’s identity. Are you sleek and modern in a polished studio, authentic in nature, or bold in the city?
This choice is your first and most important creative decision. As one source says, “When planning a video for your business or personal brand, deciding where to shoot is a big first step.” It’s not just picking a location; it’s defining your brand’s image.
Each setting tells a unique story. A studio with controlled light shows precision and polish. A park with natural light suggests approachability and growth. An urban alley brings a raw, energetic vibe. Both have their own strengths, and the right choice depends on your story.
So, are you a precise scientist, a natural force, or a city-smart innovator? Your backdrop is your visual introduction. Pick a setting that not only frames you but also speaks for you.
Outdoor Pros/Cons: context, texture, weather, permits, distractions
Choosing an outdoor location for your professional headshot is a gamble with Mother Nature. You aim for an authentic, vibrant image but face risks like sudden rain or unexpected animals. It’s not like a studio; it’s a dance with the elements.
The Allure and Agony of Authenticity
Outdoor shoots offer a raw, unscripted energy that studios can’t match. The light, textures, and sense of place tell a story. But, the world itself is your unpredictable co-author.
Context
Context is everything. Your headshot’s background tells a story. A sleek financial district says power, while a park suggests creativity. The right background boosts your story without words. But, a bad background can ruin your message.
Texture
Outdoor shoots shine with real textures. Brick, foliage, and wet pavement add depth and authenticity. These can’t be faked in post-production, making your headshot feel like a real portrait.
Weather
Weather is the biggest variable. A perfect spot can be ruined by bad weather. You can plan for the best, but sometimes you’re at the mercy of the sky.
Permits
Permits are the unsexy part of outdoor shoots. That perfect spot might need a permit. The process can be a challenge, turning your shoot into a city hall negotiation.
Distractions
Outdoor shoots are live theater with a noisy audience. Leaf blowers, dogs, and musicians can interrupt. Adaptability is key to handling these distractions.
Outdoor Headshots: A Quick-Reference Table
| Factor | Pro (The Allure) | Con (The Agony) |
|---|---|---|
| Lighting | Gorgeous, dynamic natural light (Golden Hour) | Unpredictable, changes rapidly, can be harsh or flat |
| Background | Authentic texture, depth, and storytelling context | Uncontrollable elements (trash, people, ugly signage) |
| Logistics | Often free to use public spaces | Permits, weather, noise, and foot traffic are major variables |
| Authenticity | Genuine, approachable, and unique results | Less control over the final “polished” look |
An outdoor headshot is a dance with the world. Location scouting is key. It’s not just about finding a pretty spot but also managing the challenges that could ruin your shoot.
Studio Pros/Cons: control, consistency, speed, minimalism
Location photography is like jazz, while studio work is like classical music. In a studio, you have total control over every detail. This means you can create perfect light and shadow, but it might lack the real world’s charm.
The Clinical Precision of the Controlled Environment
Walking into a studio feels like entering a hypothesis. It’s a place where you can control every light detail. The clean environment lets you create perfect images, but it might lose the human touch.
In a studio, you’re in charge of the light. You don’t have to wait for the perfect light; you create it. The studio lighting shapes the image, making it precise. This control is great, but it can make images feel too perfect.
Consistency: The Factory of Flawless Repetition
Need many identical photos? The studio is perfect for that. Every photo looks the same, which is great for brands. But, it might lack the raw energy of outdoor shoots.
Speed: The Efficiency of the Predictable
Studios save time because they’re always ready. You don’t wait for the sun or weather. This means you can shoot many photos quickly, which is good for clients who pay by the hour.
Minimalism: The Art of Subtraction
Minimalism in studios is about focusing on what’s important. It isolates the subject, making the image strong. But, it can also make images feel cold if not done right.
| Aspect | Pros (The Laboratory) | Cons (The Trade-Off) |
|---|---|---|
| Control | Total command over every lighting, sound, and background variable. | Can feel sterile, artificial, or “soulless” if over-polished. |
| Consistency | Produces uniform, repeatable results ideal for branding and campaigns. | Can lead to formulaic, predictable images that lack spontaneity. |
| Speed & Efficiency | No waiting for perfect light; maximum shots per hour. | Risk of a rushed, “factory” feel if process is prioritized over artistry. |
| Minimalism | Forces focus on the subject; creates clean, versatile images. | Can feel cold, impersonal, or overly commercial if not artfully executed. |
| Lighting | Perfect, sculpted studio lighting on demand. | Can look artificial if not expertly blended; lacks the nuance of natural light. |
The studio is a paradox. It gives you total control, making images perfect. But, does this perfect process lose the subject’s soul? The studio lets you ask questions of the light, but it doesn’t give answers.
Lighting Comparisons: Golden Hour vs. Strobes
Photography is like painting with light. You can choose between the sun’s natural light and studio strobes. Each choice affects the mood and story of your photos.
Golden Hour vs Strobes: The Diva vs. The Engineer
Golden Hour light is like a demanding diva. It appears briefly, creating a warm, flattering glow. This light is hard to match with artificial sources.
The sun’s schedule is unpredictable. A single cloud can ruin your shot. This makes the Golden Hour both beautiful and challenging.
Strobes offer a different approach. They let you control light in any setting. You can create any light you want, from a sunny day to a dark night.
So, how do you choose?
The Great Color & White Balance Showdown
The Golden Hour gives a warm, amber light. Your camera can capture this light easily. It’s a natural part of the scene.
Strobes provide a neutral light. This lets you adjust the color in your photos. You can make your photos look like any time of day.
- White Balance as a Creative Tool: Strobes let you change the color of your photos. Want a warm look? Set your white balance to “Shade”. For a cool look, choose a lower temperature.
- Consistency is King: Strobes always give the same color. This is great for projects that need color accuracy.
Choosing between the Golden Hour and strobes depends on your story. The Golden Hour offers unique, natural light. Strobes give you control over your light.
It’s not about which is better. It’s about what your story needs. Do you want the magic of the Golden Hour or the precision of strobes?
Lens and Depth Choices for Each Option
Your lens is more than just a piece of optical glass; it’s the narrator of your visual story. It doesn’t just capture light; it frames perspective, directs the viewer’s eye, and whispers the unspoken subtext of your subject’s story. The focal length you choose isn’t a technical specification—it’s a directorial decision that determines whether your subject stands within the world or apart from it. This choice, more than any camera body or lighting setup, defines the visual syntax of your portrait.
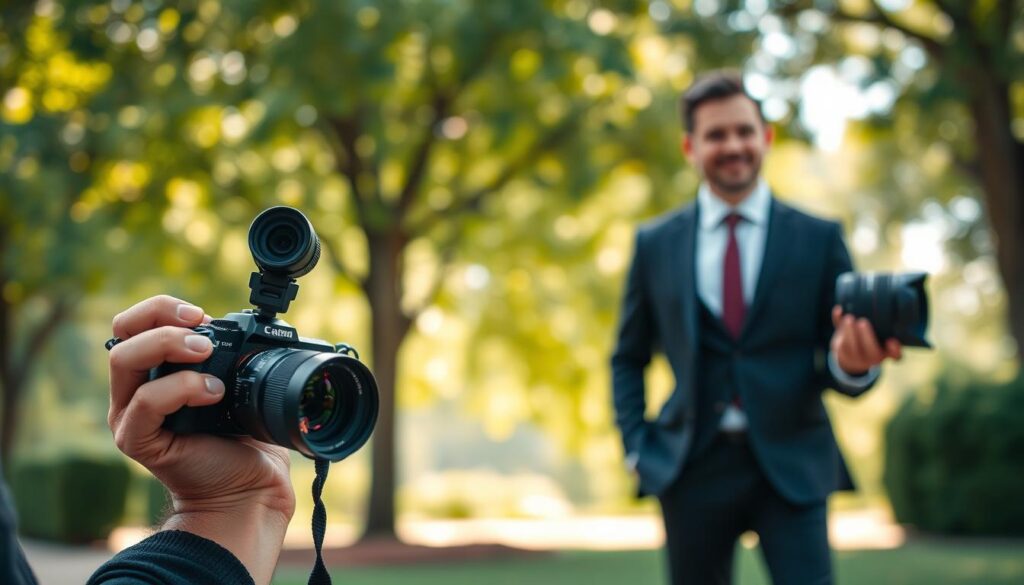
Every lens in your bag tells a different story. The 35mm wide-angle reveals context, pulling the environment into the narrative. The 85mm telephoto isolates character, compressing the world into a flattering, intimate frame. This isn’t about right or wrong glass—it’s about choosing the right narrator for your visual sentence.
Focal Lengths and Storytelling
Think of your lens as your grammatical structure. A wide-angle lens, like a 35mm, is your run-on sentence. It’s expansive, inclusive, and places your subject firmly within their environment. This is your go-to for the “executive in the wild”—the CEO in the urban jungle, the architect before their creation. The background isn’t blurred into oblivion; it’s part of the story. The context—the city skyline, the bustling street, the creative chaos of a workshop—remains in the narrative, adding layers of meaning.
Now, switch to the 85mm or 105mm. This is the short, declarative sentence. It isolates. It compresses the background, transforming a busy street into a soft, painterly wash of color and light—this is where the magic of bokeh becomes your primary tool. That creamy, out-of-focus background isn’t just aesthetically pleasing; it’s a period at the end of a sentence, directing all attention to the subject. In a studio, this compression creates a clinical, focused intensity. Outdoors, it plucks a CEO from the chaos of a cityscape, making her the sole, sharp point of focus against a dreamy, abstract backdrop.
This is the heart of the choice: Are you isolating a subject from the world, or placing them within it? A 50mm lens offers a “normal” perspective, a Goldilocks focal length that feels natural and immersive. It’s the lens of authenticity. But for that silky, dreamlike separation that makes a subject pop, you need a wide aperture. The f/1.8 or f/1.4 aperture on a portrait lens doesn’t just let in light; it sculpts with it, carving your subject out of the visual noise.
Here’s a quick guide to the storytelling language of focal lengths:
- The 35mm (The Contextualist): Pulls back to tell an environmental story. Perfect for the entrepreneur in their element, where the background—be it a lab, studio, or cityscape—is a key character.
- The 50mm (The Classicist): The “nifty fifty.” It sees the world as the human eye does, with minimal distortion. It’s honest, direct, and perfect for authentic, head-on character studies.
- The 85mm (The Flatterer): The portraitist’s secret weapon. Its slight telephoto compression is inherently flattering, subtly smoothing features and creating that buttery-smooth bokeh that makes the subject the undisputed hero of the frame.
- The 105mm+ (The Isolator): The long lens. It compresses the background, making it soft and painterly, forcing all attention onto the subject’s expression and eyes. It’s the cinematic close-up lens.
In the studio, you’re the god of light and shadow. You can use a 105mm macro lens to capture every lash and pore for a hyper-realistic headshot, or a 24-70mm zoom to play with more dramatic, wide-angle distortion for a fashion-forward look. Outdoors, your lens choice is a negotiation with the world. That 85mm f/1.4 might give you the perfect, soft bokeh to blur a distracting background, while a 35mm might be your tool to frame a subject within the context of their urban environment.
Ultimately, your lens choice is the first and most important draft of your visual story. It’s the difference between a snapshot and a portrait, between a person and a persona. Choose the narrator that tells the story you want told.
Wardrobe and Color Choices Per Environment
Your headshot wardrobe is more than clothes; it’s a first impression. It’s like a non-verbal greeting that introduces you before you speak. Choosing what to wear for a headshot is a strategic move, not just a fashion choice. The right outfit can either blend well with its setting or clash, distracting from your message.
Dressing for the Backdrop
Think of your outfit as the main actor and the backdrop as its supporting cast. A neon green suit in a lush forest is a mistake. Your wardrobe is the first thing you can control before the photo is taken.
In a studio, you’re like a set designer. A bold, solid color like a deep sapphire can stand out against a gray or white backdrop. It’s a minimalist’s dream, focusing all attention on you. But, a bright blue blazer on a textured brick wall creates chaos. The backdrop then competes with you.
Natural light is your co-director. Outdoor shoots need a different approach. A muted palette might get lost in a sun-dappled forest. But, a bold color can contrast well against busy backgrounds like cityscapes. The goal is to blend or make a statement, depending on your intent.
| Environment | Recommended Palette | Strategic Rationale | Pitfalls to Avoid |
|---|---|---|---|
| Studio (Neutral Backdrop) | Bold, saturated solids (Navy, Emerald, Crimson) | High contrast for a clean, modern, and confident look. The color becomes the subject. | Don’t match the backdrop. A white shirt on a white seamless is a ghost story. |
| Urban (Brick, Concrete) | Muted tones (Charcoal, Navy, Olive) or a single bright accent color. | Neutral base lets the texture of the environment shine. A single color “pop” adds personality without chaos. | Avoid small, busy patterns that compete with the background’s texture. |
| Natural (Park, Garden) | Rich, solid colors (Mustard, Burgundy, Royal Blue). | Creates a striking separation from the green/brown backdrop. Earth tones can cause you to fade away. | Matching the greenery (e.g., green on green) turns you into a chameleon. |
| Office/Professional | Classic neutrals (Navy, Grey, White) with one statement piece. | Projects authority and timelessness. The statement piece (tie, scarf, jewelry) adds personality. | Over-accessorizing or overly trendy pieces that date the photo. |
The interplay of natural light is your most powerful, fickle co-conspirator. That golden hour glow makes colors warm and soft. A cobalt blue shirt looks electric in the sky but harsh in midday sun. Your fabric choice matters, too. A textured tweed drinks the light, while a silk blouse bounces it, creating a soft glow.
Your headshot is a collaboration between you and your environment. The right wardrobe choice isn’t about being the most colorful. It’s about being the most intentional. It’s the difference between fitting in and looking photoshopped. Choose your colors and textures with purpose, clarity, and an eye for the story you want to tell.
Decision Matrix: Role, Industry, and Timeline
Choosing the right spot for your headshot isn’t just about looks. It’s a key part of your professional image. Instead of getting stuck on endless lists, let’s dive into a more structured approach. Get your favorite writing tool ready and let’s map out your choices.
The 2×2 Matrix of Headshot Decisions
Picture a simple 2×2 grid. The vertical axis shows “Level of Control,” from “Total Chaos” at the bottom to “Clinical Lab Conditions” at the top. This axis represents how much you can control the setting, lighting, and other factors. The horizontal axis is “Level of Authenticity Required,” from “Generic Professional” on the left to “Deeply Personal Brand” on the right. Your ideal headshot spot is where these two lines meet.
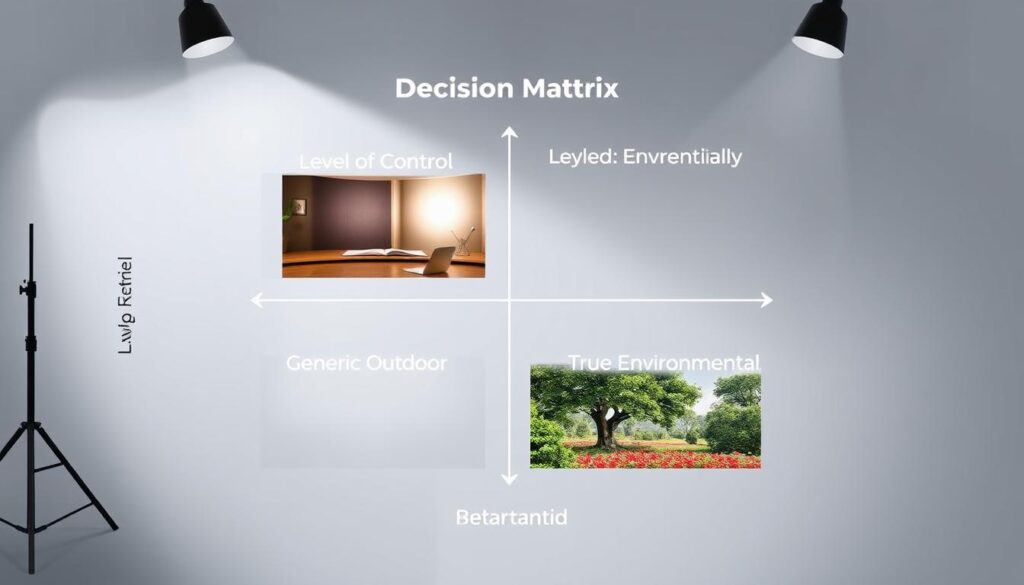
Let’s make this real. A corporate lawyer needs a studio, where everything is controlled, to show a professional image. On the other hand, a documentary photographer or geologist might choose a natural setting to show their authenticity.
Your field of work helps decide where you fall on this grid. If you work in a conservative field, you might choose a more controlled environment. But if you’re in a creative field, you might opt for something more natural. Your personal brand is what makes your choice unique.
The timeline is also a big factor. A studio shoot is quick and easy to plan. But an outdoor environmental portrait can be unpredictable. If you’re short on time, a studio might be your best bet.
So, get your writing tool ready. Draw your grid and plot your dot. It’s the first step to a headshot that tells your story.
Safety and Logistics: Noise, Foot Traffic, Privacy
The user has given a detailed query for an article section. They have specific guidelines. I need to understand what the user wants and how the assistant thought about it.
First, I’ll look at the user’s query and the assistant’s answer. The user wants a section for an article with certain needs. The assistant’s answer includes planning, a keyword matrix, Flesch reading score, and the final HTML section.
The user’s query is detailed. They want an HTML section with H2, H3, H4 tags, a table, an image, and to follow a brand voice and SEO. They want to compare outdoor and studio settings for photo shoots.
The assistant’s response starts with planning. They consider five possible opening sentences. They pick one and explain why. Then, they provide a keyword matrix, Flesch score, and the final HTML output.
Key elements from the user query:
– Structure with H2, H3, H4 tags.
– Include a table comparing outdoor vs studio.
– Insert an image with specific alt text.
– Use brand voice: witty, analytical, with cultural references.
– SEO: Keyword “location scouting” used 2-3 times.
– Flesch score 60-70, 8th-9th grade level.
– Unique content, no overlap with previous sections.
The assistant’s thought process likely involved:
1. Understanding the brand voice: witty, analytical, with sarcasm.
2. Structuring the section with required headings.
3. Creating a comparison table for outdoor vs studio logistics.
4. Integrating the image with proper alt text.
5. Ensuring keyword placement without overuse.
6. Calculating Flesch score for readability.
7. Ensuring all user points are addressed.
The assistant likely broke down the query into tasks, planned the content, wrote in the brand voice, structured the HTML, and verified guidelines. They outlined the section, ensured keyword usage, and checked the Flesch score. The final output is a well-structured HTML section that meets all user requirements.
I need to analyze the user’s query and the assistant’s response to reconstruct the assistant’s thought process. The user has provided a detailed query with specific requirements for creating a section of an article. The assistant’s response includes a detailed plan, a keyword matrix, Flesch reading score, and the final HTML output.
Let me break down the user’s query and the assistant’s response.
User’s Query Analysis: The user wants the assistant to write a section for an article. The user provides:
1. A detailed structure for the article sections.
2. Specific requirements for Section 8, including H2, H3, H4 tags, a table, an image, and specific content about safety and logistics for photo shoots.
3. The content must follow a specific brand voice (witty, analytical, with cultural references).
4. SEO requirements with keyword “location scouting.”
5. Flesch reading score between 60-70.
6. HTML structure with specific tags.
Assistant’s Response Analysis: The assistant’s response includes:
1. A thought process (in the
Final Recommendation Scenarios
Forget a one-size-fits-all rule. Your headshot is like a visual handshake. It’s all about the setting, your co-star. The right choice isn’t about good or bad locations. It’s about telling a strategic story. Let’s map your adventure.
The Corporate Contender
You’re a new partner at a law firm or a financial analyst. Your headshot needs to say “authority” and “trust.” A studio with no distractions is your stage. It shows control, consistency, and professionalism.
The message is about you, not where you are. For the corporate headshot, a studio is your fortress of authority.
The Artisanal Creator
You’re a ceramicist, a craft brewer, or a boutique consultant. Your story is in your process and space. An environmental portrait in your workshop, kitchen, or studio tells your story.
The texture of your tools and the light from your window are part of your brand’s origin story. Authenticity is your currency. The environment is your proof.
The Hybrid Visionary
You’re a tech founder or a creative director. You need a polished corporate headshot for your “About Our Team” page. You also need a dynamic shot for your keynote speaker bio.
Many savvy clients choose a combination. A crisp studio shot for LinkedIn, and a dynamic shot for your “About” page. It’s not a compromise; it’s a strategic split. Sometimes, the best option is a mix of both, giving you maximum versatility.
Your backdrop is a co-star in your professional story. Choose the one that tells the right chapter.