

Welcome! We’re glad you’re here. Have you ever felt awkward or unsure in front of a camera? You’re not alone. This guide is your starting line to feeling powerful and at ease.
We’re going to dive into the fascinating science behind body language. Looking confident on camera isn’t about being perfect. It’s about understanding the simple, powerful signals your posture sends.
Think of it like learning a new language. Once you know the basic grammar—your stance—you can start to have fluent, confident conversations without saying a word.
We’ll share inspiring success stories and expert advice to show you that anyone, including you, can master this. Our goal is to demystify the “why” so the “how” makes perfect sense.
Ready to begin? Let’s explore why your non-verbal communication is so powerful and how you can harness it.
Foundational Setup: stance, spine, chin, shoulders, feet
Getting a great photo starts with your feet. It’s your posture correction guide. We aim for a pose that feels strong and natural.
We’ll focus on five key areas. Master these, and you’re set for any photo.
Your feet are your base. Don’t stand with them too close together. Instead, keep them shoulder-width apart. Imagine being a strong tree, with your feet as roots.
For a dynamic look, try a slight stagger. Place one foot a few inches behind the other. This adds depth and makes you look ready.
2. Your Spine: The Pillar of Height
Align your spine with a simple trick. Imagine a string pulling your head up. Your neck and torso will lengthen. You’re not trying to look different, just taller.
This trick opens your chest and improves your clothes’ fit. It’s the opposite of slouching, which can make you look closed off. Good spine alignment is key for effortless posture correction.
3. Your Shoulders: The Relaxation Zone
When we’re nervous, our shoulders go up. In photos, this shows tension. Roll your shoulders up, back, and down to relax them.
Keep them slightly back but not too tight. This makes you look more open and friendly. If they start to creep up, breathe and let them drop.
4. Your Chin: The Angle Finder
A double chin in photos often comes from how you hold your chin. Don’t tuck it down. Instead, push your head forward slightly to lengthen your neck.
Then, angle your chin down and out. This defines your jawline and looks great. Practice in a mirror to find your perfect angle.
5. Putting It All Together
These steps work together, not separately. Start with your feet. Feel stable. Let that stability move up your spine.
Relax your shoulders on that strong spine. Then, position your chin for the final look. This approach is about finding a balanced stance that makes you look and feel confident. Practice until it feels natural.
Head/Face: jawline tricks, genuine smile, eye light, micro-expression coaching
Your face is like a canvas where your true self is shown through small movements. It’s where your personality comes alive and connects with others. We aim to look confident and friendly, not stiff or fake.
Let’s begin with a simple yet powerful jawline trick. Ever feel like your chin disappears in photos? Try this: gently press your tongue to the roof of your mouth, just behind your front teeth. This action engages the muscles under your chin, making your jawline more defined and natural. It’s a game-changer that feels more natural than trying to push your chin out.
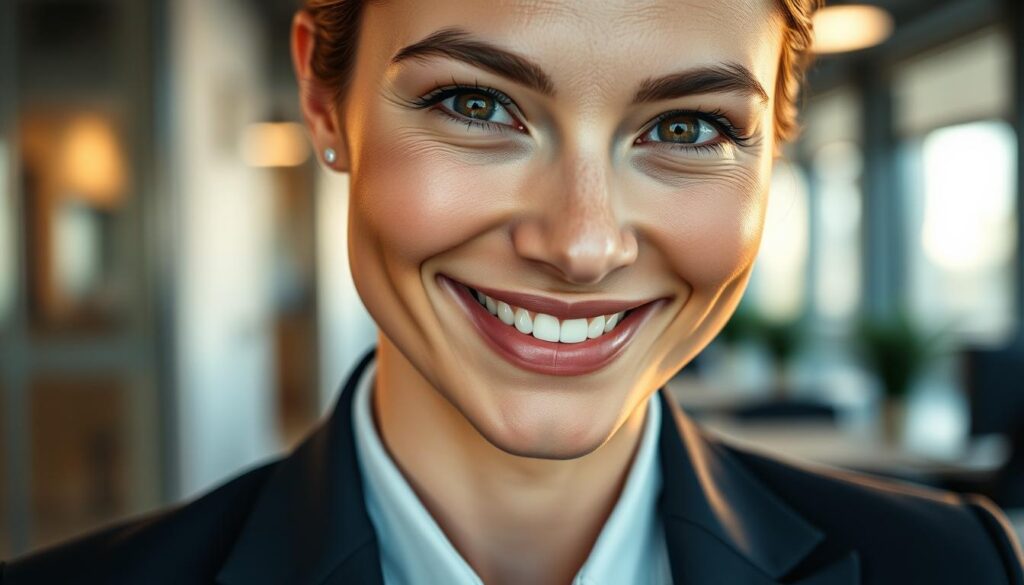
Next, let’s work on a genuine smile. A fake smile only reaches your lips, but a real one lights up your whole face, including your eyes. To get one, think of something that makes you genuinely happy—a funny memory, a joke. Don’t just say “cheese”! Let that joy crinkle the corners of your eyes. This creates that sought-after “eye light,” a sparkle that shows you’re fully present and engaged.
Remember to “see” the lens. Imagine you’re looking at a friend just on the other side of the camera. This softens your gaze and prevents a cold, distant stare. Your eyes are the windows to your engagement, so keep them warm and connected.
Now, let’s talk about micro-expressions. These are the tiny, involuntary facial movements that flash across our faces in fractions of a second. They show our true emotions. While we can’t fake them, we can coach ourselves to be more aware and relaxed, allowing positive ones to surface naturally.
For example, a slight, quick lift of the eyebrows can signal interest and openness. A tiny smile that starts and fades can look thoughtful, not posed. The key is to avoid holding one frozen expression. Let your face be alive with these natural micro-expressions. They are the ultimate tool for looking authentic and trustworthy on camera.
By combining a defined jawline, a smile that reaches your eyes, and relaxed, authentic micro-expressions, you transform your portrait from a simple picture into a compelling story. Practice these techniques in the mirror—you’ll be amazed at the difference!
Hands & Props: laptops, pens, pockets, crossed-arm variations that feel natural
Hands can seem like awkward accessories, but with a few tricks, they become powerful tools. This section will help you move from feeling unsure about your hands to looking naturally engaged. We’ll look at using everyday objects and classic poses to enhance your look.
First, let’s talk about props. A good prop should add to your story, not take away from it. Think of it as a co-star, not the main actor. When holding a laptop, avoid the classic “product shot” pose. Instead, rest it casually on one arm or place it on a surface and lean in slightly. This creates a sense of interaction and thoughtfulness. For more ideas on integrating tech seamlessly, consider principles of thoughtful design.
A pen is a great small prop. Don’t just clutch it tightly. Try holding it loosely between your fingers, as if you’ve just paused while writing. Or, tap it gently against your chin in a thinking pose. The key is to look like you’re using the item, not just holding it for the sake of it.
Pockets are a popular refuge, but they can sink your pose if done wrong. The rule? Thumbs in, fingers out. Slide just your thumbs into your front pockets, letting your fingers rest casually on the outside of your pants. This keeps your frame open and relaxed. Avoid shoving entire fists deep into pockets, as it pulls your shoulders forward and closes off your body language.
Now, let’s tackle the crossed-arms pose. It often signals defensiveness, but it doesn’t have to! The secret is in the variation. Try the “one-arm cross.” Simply fold one arm across your waist and let the other hand rest on your hip or at your side. Another great option is the “loose cross,” where you gently cradle one elbow with the opposite hand. These adjustments maintain a confident, thoughtful hands placement without creating a barrier.
Remember, the goal is to look natural, not staged. Your hands should have a slight bend at the wrist and elbow—avoid stiff, straight limbs. Before a shoot, take a moment to shake out your hands and wrists to release tension. With practice, these positions will start to feel like second nature, turning a point of anxiety into a point of power.
Sitting vs Standing vs Leaning poses
Should you sit, stand, or lean for your next photo? The answer varies based on your situation, comfort, and message. We’ll explore the pros and cons of each pose to help you choose wisely.
Your body is like a line on a page. A straight line is simple but can be dull. An interesting curve grabs attention. Using asymmetry can make your pose more dynamic and engaging.
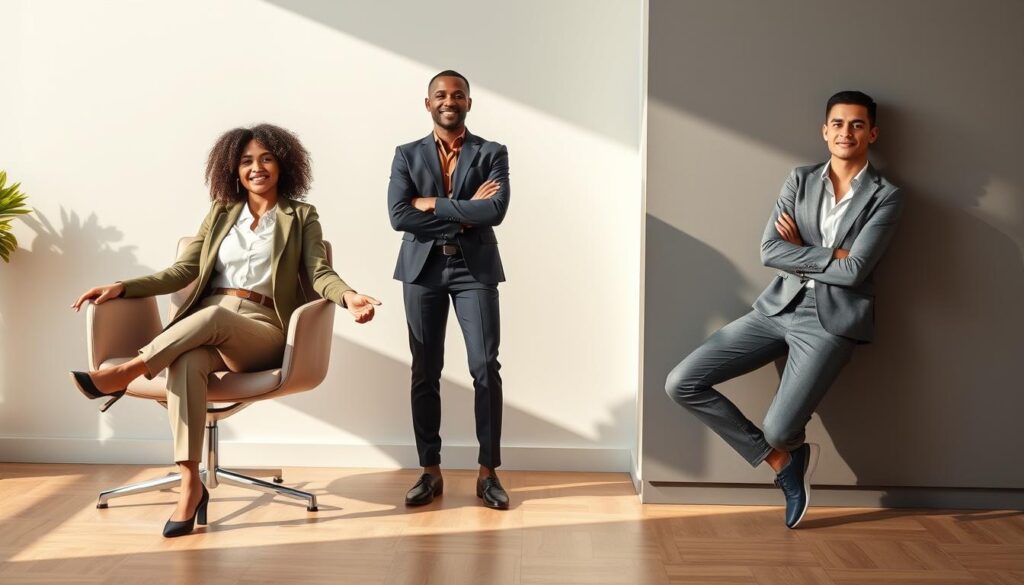
Sitting shows stability and thoughtfulness. It’s great for desk shots and interviews. But, avoid slouching or looking too casual.
To look authoritative while seated, keep your feet flat and sit forward. This keeps your spine straight.
Introduce asymmetry by crossing your ankles or angling your upper body. Avoid perfect square shoulders. A slight angle is more flattering.
Standing Poses: The Power Stance
Standing poses show energy and authority. They’re perfect for headshots and team photos. But, avoid the “military at attention” stance.
Instead, shift your weight onto one leg. This makes your hips angle and shoulders relax. It makes you look ready for action. For more on confident posture, check out Amy Cuddy’s research.
Leaning Poses: The Casual Connector
Leaning suggests ease and creativity. It works well against walls or counters. But, it’s key to look supported.
Make sure a solid part of your body touches the surface. Then, use asymmetry. If leaning right, bend or cross your left leg. This balances your pose.
| Pose Type | Best For Conveying | Key Pro Tip | Asymmetry Cue |
|---|---|---|---|
| Sitting | Stability, thoughtfulness, approachability | Sit forward in the chair, feet flat | Cross ankles or angle upper body |
| Standing | Energy, authority, readiness | Weight on back leg, relax shoulders | Shift weight to one leg |
| Leaning | Ease, creativity, informal connection | Make real contact with the surface | Bend or cross the non-leaning leg |
Choosing a pose depends on the setting and your message. A formal headshot might need a strong standing pose. A podcast interview could use a relaxed seated pose. A creative portfolio shot might lean casually.
Once you decide, remember to break the symmetry. This simple change makes your pose look cool and unique. You’re not just posing; you’re communicating with purpose.
Glasses, Facial Hair, and Hair Management
Let’s focus on the finishing touches: your glasses, facial hair, and hair. These small details can make a big difference in your on-camera confidence. With a few simple tips, you can ensure they always look polished, so your audience focuses on your message — not distractions.
Wearing glasses? Many people struggle with glare, which can hide your eyes and reduce connection with the audience. The solution is simple: adjust your lighting and camera angle. Place your main light source above and to the side of your eyes, rather than directly in front. Slightly tilting your chin down can also help eliminate reflections. Additionally, lenses with an anti-reflective coating are highly effective for video calls.
Just like a traveling sketchbook library, where artists carry their tools and refine their work wherever they go, managing these details allows you to experiment and perfect your on-camera appearance. Each adjustment, small as it may seem, contributes to a professional and confident impression — whether it’s a LinkedIn video, Zoom call, or live presentation.
For those with facial hair, keeping it neat is your secret. A well-groomed beard or mustache looks authoritative on camera. Aim for clean lines and definition. Regular trims and a bit of beard oil or balm can keep your look sharp and shiny.
Pro tip: Be patient if you’re growing facial hair. A fully grown look, whether clean-shaven or bearded, looks more confident than a patchy one.
Now, let’s talk about hair management for everyone. The camera picks up every stray hair. Aim for a style that feels like you and then secure it. A light-hold pomade, wax, or hairspray can keep your hair in place without looking stiff.
If you have long hair, a simple pull-back or bun can keep it out of your face. For shorter hair, a quick brush and matte product can add texture and control. Remember, if you’re always pushing hair out of your eyes, it’s time for a new look.
These details add the final polish to your look. When your glasses are clear, facial hair is sharp, and hair is in place, you look ready and confident. You’ve removed distractions, so your message gets the focus it deserves.
Inclusive Posing: plus-size, petite, tall, mobility needs
Let’s move beyond one-size-fits-all advice. We’ll explore posing strategies for plus-size, petite, tall, and mobility-conscious individuals. Confidence isn’t a one-size-fits-all outfit—it’s a custom fit! Our goal is to provide you with adapted guidance that highlights your unique strengths and makes you feel powerful in your skin.
Remember, the best posing tips are the ones that work for you. We’ll break down approaches for different body types and needs. This way, you can build a personal toolkit of go-to poses.
Posing Tips for Plus-Size Individuals
For our plus-size friends, the key is to create flattering angles and a confident silhouette. Avoid standing square to the camera. Instead, turn your body slightly to a three-quarter angle. This creates a natural, slimming line.
Engage your core and roll your shoulders back. This simple act of power posture instantly elongates your torso and projects assurance. Use props like a chair arm to lean on or a laptop placed on a table. These create natural breaks and add dynamic interest to the shot.
Most importantly, wear clothing you feel amazing in. Confidence is your most powerful accessory!
Posing Tips for Petite Individuals
If you’re petite, your primary posing tips focus on creating elongation and avoiding being swallowed by the frame. Stand up straight! Good posture is your best friend for adding perceived height.
Be mindful of your surroundings. Pose against simpler backgrounds to avoid visual clutter. When sitting, choose chairs where your feet can touch the ground or a footrest. This prevents you from looking like you’re dangling.
Use perspective to your advantage. Having the camera slightly above eye level can be more flattering than a low angle. Don’t be afraid to occupy space—leaning against a wall or placing a hand on your hip creates a strong, grounded presence.
Posing Tips for Tall Individuals
Tall individuals should embrace their height while avoiding an awkward, stiff look. If you’re standing, try placing one foot slightly in front of the other and bending the front knee a little. This creates a relaxed, dynamic stance.
When sitting, be conscious of your limbs. Cross your ankles or angle your knees to the side to avoid your legs dominating the frame. Use your height to your advantage in leaning poses! Leaning against a doorway or a high table can look incredibly natural and commanding.
The goal is to look elegantly in command of your space, not cramped or folded up.
Posing Tips for Mobility Needs
For those with mobility needs or chronic pain, posing is all about adaptation and comfort. Your stability and well-being are the top priority. Seated poses are often a fantastic starting point. Use a supportive chair and focus on excellent upper body posture.
Props become essential tools. A cane can be a powerful posing aid for balance and style. A desk or table provides support for standing or leaning. The key is to integrate your support items naturally into the pose, making them part of your story.
Communicate with your photographer (or your timer) about what feels sustainable. A genuine, comfortable pose held for 10 seconds is worth a hundred strained ones.
| Body Type / Need | Primary Goal | Top Posing Tip | Helpful Prop or Idea |
|---|---|---|---|
| Plus-Size | Create flattering angles & confident silhouette | Use a three-quarter body turn to the camera | Lean on a chair arm or table to create dynamic lines |
| Petite | Achieve elongation & command space | Maintain excellent posture and stand up straight | Pose against simple backgrounds; use a footrest when seated |
| Tall | Avoid stiffness; use height dynamically | Bend the front knee in a staggered stance | Use your height in leaning poses against tall structures |
| Mobility Needs | Ensure stability & integrate comfort | Prioritize seated or supported poses | Use a cane, desk, or supportive chair as a natural part of the pose |
These inclusive posing tips are your starting point. Mix, match, and modify them until you find what makes you feel most like yourself. True confidence comes from owning your space—whatever that means to you. Now, let’s get your body ready to put these ideas into action!
10-Minute Warm-Up Routine + Mirror Drills
Muscle memory isn’t just for athletes. A simple 10-minute routine can train your body to naturally fall into confident poses. Think of this as your personal pre-shoot ritual. It shakes off nerves and tells your brain it’s showtime!
Why warm up? Sitting or standing for photos can make anyone feel stiff. A quick physical and mental reset loosens your joints and wakes up your face. This is key for activating those authentic micro-expressions—the tiny, genuine signals that make a smile look real.
Let’s walk through the routine together. Set a timer for 10 minutes and find a private space.
- Shake It Out (2 minutes): Literally shake your hands, arms, and legs. Jump lightly in place. The goal is to release physical tension and get your blood flowing. No grace required!
- Spine Rolls & Shoulder Circles (2 minutes): Roll your shoulders forward and back. Slowly drop your chin to your chest and gently roll your head from side to side. This combats that “computer hunch” posture.
- Face Gym (3 minutes): This is your micro-expressions boot camp. Exaggerate a smile, then relax. Raise your eyebrows in surprise. Practice a thoughtful, slight smirk. The goal isn’t to memorize these faces, but to remind your muscles they can move freely.
- Power Stance (2 minutes): Stand with feet shoulder-width apart. Place your hands on your hips and take three deep, slow breaths. Feel your posture straighten naturally. This builds a foundation of calm authority.
- Mental Visualization (1 minute): Close your eyes and picture yourself in the shoot, looking relaxed and confident. See the successful outcome.
Now, let’s put it all into practice with mirror drills. Your mirror is a safe, private rehearsal space where you’re both the actor and the director. This isn’t about vanity—it’s about discovery.
Here’s how to drill effectively:
- Focus on Feeling, Not Just Looking: Try a pose. Does it feel strong or forced? Your comfort translates directly to the camera.
- Play with Your Micro-Expressions: Watch your eyes as you smile. Does the light reach them? Practice softening your gaze for a more approachable look.
- Time Yourself: Hold a standing pose for 30 seconds. This builds the endurance you need for longer shooting sessions.
- Spot Your “Go-To” Angle: Gently turn your head and notice which angle feels most natural. Now you have a confident default position.
This hands-on practice is where theory becomes your own personal muscle memory. The more you rehearse these drills, the less you’ll have to think during the actual photo session. Your body will just know what to do.
So before your next important video call or portrait session, invest those ten minutes. You’ll walk in feeling loose, prepared, and authentically yourself. You’ve got this!
Shot List & Quick Fixes Cheat Sheet
You have the knowledge. Now, let’s build your action plan. This cheat sheet turns every lesson into a simple, go-to resource.
Start with your shot list. For a professional headshot, use a solid stance and a genuine smile. For webinar speaking, try leaning poses with open hand gestures. Intro videos work great with a slight chin tilt and engaged eye contact.
Stuck on a common problem? Our quick-fixes sheet has your back. If you feel slumped, check your spine alignment and shoulder roll. For a forced smile, think of a happy memory to spark a real one. These solutions come from real success stories.
This toolkit is built on proven expert advice. It distills the best tips into one page you can print and keep. Refer to it before any camera session to feel instantly prepared.
We designed this playbook to be your personal coach. The real magic happens when you practice these steps. Your confidence will grow with every shot you take.