

Welcome! Let’s uncover what executive presence really means on camera. Your professional photo is like a visual handshake. It’s often the first thing people see, whether it’s investors, clients, or your team.
We’ll dive into the key elements that make a headshot stand out. It’s not just about looking good. It’s about showing authority, being approachable, and exuding confidence without words.
Take leaders like Satya Nadella or Indra Nooyi. Their photos show a clear and true leadership brand. You feel their competence and character in one picture. How do they achieve this?
We’ll show you how to turn your vision and values into a powerful photo. This is key for creating a unified look for your team. We’ll also explore more about professional corporate photography. Are you ready to make your image as impactful as your work?
Preproduction: Creative Brief, Moodboards, Shot List (Headshot, Half, 3/4)
Let’s explore the key planning stage that turns a simple photo session into a strong branding tool. This stage is called preproduction. It’s where your vision turns into a real plan. Think of it like a recipe for baking a cake—skip a step, and the result might not be what you hoped for!
Your first step is creating a creative brief. This isn’t just a document; it’s your guide for the entire shoot. A good brief answers key questions: What is the core message of our brand? Who is our target audience? What feeling should these images evoke? When you align your photos with your company’s vision from the start, every decision becomes clearer and more purposeful.
Next, we turn words into visuals with moodboards. If the creative brief is the script, a moodboard is the storyboard. It’s a collage of images, colors, and textures that shows the desired look and feel. This is a critical part of the art direction process, ensuring everyone is on the same page.
Now, let’s get practical with the shot list. This is your day-of-game plan. A detailed shot list prevents wasted time and ensures you capture all the assets you need. We recommend planning for three primary types of portraits:
- The Classic Headshot: Tightly framed on the shoulders and face. Perfect for LinkedIn profiles, company directories, and press releases. It’s all about confident, direct connection.
- The Engaging Half-Body Shot: Framed from the waist up. This shot allows for more personality and context, like showing a subtle hand gesture or the texture of a blazer. It’s ideal for website “About” pages.
- The Dynamic Three-Quarter Shot: Captured from mid-thigh up. This provides even more environmental context and conveys approachability and presence. Use it in investor decks or keynote speaker bios.
Why such variety? Different platforms and messages require different visuals. A single headshot can’t do everything! By planning these shot lists in advance, you guide the photographer efficiently. You’ll move seamlessly from one setup to the next, maximizing your time and budget.
The ultimate payoff? You walk away with a versatile library of professional images. You’ll have the right photo for every need, from a news feature to an internal newsletter. Solid art direction and meticulous preproduction don’t just create pictures—they build a consistent and compelling visual brand foundation.
Styling for Leaders: simple fits, textures, signature color, eyewear strategy
Your headshot attire is like a silent partner, showing trust and skill without words. It’s not about following trends. It’s about strategic visual communication that matches your brand and goals.
Great art direction for executive headshots comes from smart styling choices. We’ll show you a simple framework with four key elements. These help you look real, strong, and in line with your company’s image.
Start with simple fits. Choose clothes with clean lines and a tailored look that doesn’t bunch. Avoid busy patterns, loud logos, or trendy cuts that distract from your face. You want the viewer’s eye to focus on you, not your clothes.
A classic button-down shirt, a fitted blazer, or a simple dress is best. These pieces show professionalism without being too loud. In executive headshots, simplicity is strength.
Next, think about textures to add depth and class. Texture makes your image interesting and suggests quality. Consider a fine-gauge merino wool sweater, a crisp cotton shirt, or a tailored wool blazer.
These materials look great on camera and feel luxurious. Texture makes your portrait stand out in a digital world. It’s a subtle but powerful tool in your art direction toolkit.
Now, let’s talk about your signature color. This is the color you naturally choose and are known for. Using this color builds instant recognition across your platforms.
If you always wear navy blue, go for it. If a certain green makes you feel confident, choose it. This consistency makes you memorable. Your signature color is part of your brand, making your executive headshots stand out.
Lastly, we have the eyewear plan for leaders who wear glasses. Glasses are part of your identity but can cause glare or shadows. Here’s how to handle it: work with your photographer to avoid reflections. Clean your lenses before the shoot. You might also take shots without glasses for variety. The eyes are key in any portrait, so we must keep them clear and engaging.
By combining simple fits, textures, a signature color, and an eyewear strategy, you make a strong visual statement. This thoughtful styling elevates your art direction in your professional portrait.
Your clothes should feel like a natural part of your leadership style. When you’re in front of the camera, focus on your expression and energy, not your outfit. Strategic styling gives you confidence, ensuring your executive headshots say what you mean.
Directing Expressions: authority, warmth, resolve, optimism
A strong executive headshot is more than just good lighting. It’s about the story your face tells. A small sparkle in your eyes or a gentle curve of your lips can say a lot before you even speak. This is where art direction really comes into play, turning a simple photo into a powerful tool.
As a leader, your photo should show a mix of qualities. It’s not just about looking friendly or serious. You want to show a real mix that feels like you at your best. It’s like acting for the camera, getting into a certain mood to share complex ideas quickly.

Let’s look at the four main expressions every leader should master. We’ll give you tips to make each one feel natural and true to you.
Quiet Authority
This isn’t about looking stern. Authority comes from calm focus. Imagine you’re listening to a problem, already knowing the answer. Keep your gaze steady and engaged, not aggressive. Relax your forehead and let your eyes do the work. A slight, relaxed chin can add weight without being too much.
Genuine Warmth
Warmth builds trust and makes you approachable. The key is being real—a smile that reaches your eyes. Think of greeting a valued colleague you haven’t seen in a while. The magic is in the slight crinkle at the corners of your eyes. Keep your smile soft, not too wide, to stay professional.
Determined Resolve
This expression shows grit and reliability. Picture making a tough but necessary decision for your team. Your jaw should be firm but relaxed, not clenched. Show forward energy in your posture. Your eyes should show steadiness and commitment, showing you’re someone who follows through.
Forward-Looking Optimism
Optimism inspires and motivates. It’s a hint of a smile that suggests excitement for the future. Imagine the early stages of a new project, full of possibilities. Let a hopeful energy lift your features. Your eyes should look bright and slightly upward, as if looking toward the future.
To make this easier, here’s a quick guide. Use this table to connect the emotion with a simple prompt and a tiny physical tweak.
| Expression | Mental Prompt | Physical Adjustment | Best For |
|---|---|---|---|
| Authority | “I am calmly solving our biggest challenge.” | Relax forehead, steady & soft gaze, chin slightly down. | Investor materials, board profiles. |
| Warmth | “I’m genuinely happy to see you.” | Smile with eyes, slight crinkle, soften mouth. | Team pages, about us sections, social media. |
| Resolve | “We will see this through, together.” | Firm but relaxed jaw, forward lean in posture. | Press releases during change, leadership bios. |
| Optimism | “I can’t wait to start our next chapter.” | Bright eyes, slight head tilt, hint of an upward smile. | Launch announcements, career site, keynote speaker photos. |
Practice these expressions in a mirror before your shoot! The goal isn’t to memorize poses, but to find the feeling that creates the look. A great photographer specializing in executive headshots will guide you, but coming prepared with this self-awareness elevates the entire session.
This level of intention is the heart of professional art direction. It makes sure your photos don’t just show your face—they share your leadership essence. You’ll leave with a collection of versatile, powerful images that truly feel like you.
Building a Company-Wide Style Guide (backdrops, crops, file names)
A company-wide photography style guide is like a visual rulebook for your brand. It ensures consistency everywhere, from the boardroom to the breakroom. Your personal style sets the tone, but a unified look across the team makes your brand instantly recognizable.
This guide is your secret weapon. It makes sure everyone can take great, on-brand photos. Let’s create yours together!
Your guide focuses on three key areas. Master these, and you’ll have a cohesive look for your company’s public image.
1. Standardize Your Backdrops
Consistency is key here. Choose one or two approved backdrops and stick to them. Options could be a neutral color, your office lobby, or a textured wall.
Using the same backdrop for all team photos creates harmony. It shows unity and shared purpose. This simple trick boosts your leadership brand a lot.
2. Define Your Approved Crops
The frame’s cut matters a lot! Different platforms need different compositions. Your guide should list a few standard crops:
- Headshot (tight crop): For LinkedIn profiles and official bios.
- Half-body or 3/4 shot: Perfect for website “Meet the Team” pages, showing more personality.
- Environmental shot: For storytelling in annual reports or press features.
Defining these crops makes every photo versatile. No more awkward cropping by designers!
3. Master File Naming Conventions
A logical file-naming system is a game-changer. It saves time and prevents chaos. Use a format like: LastName_FirstInitial_Department_Year.jpg.
For example: Smith_J_Marketing_2025.jpg. This makes assets easy to find and organize. It turns your photo library into a well-organized catalog.
Creating a simple, one-page document is your goal. This style guide is not restrictive—it’s liberating! It gives clear rules so your team can focus on looking their best.
When everyone follows the same visual rules, your company’s leadership brand grows. You’re not just taking pictures; you’re building a legacy of professional consistency.
Multi-City Rollouts: vendor vetting, lighting spec sheet, QA process
A successful multi-city photo rollout needs three key steps. First, find the right vendors. Second, ensure consistent lighting. Third, have a strict quality check. For companies with multi-location teams, these steps are essential for a unified look. We’ll show you how to make this process smooth and repeatable.
Finding photographers who match your brand’s look is your first task. Don’t just send out a generic request. You need a detailed checklist for vetting. Here are the key questions to ask:
- Portfolio Match: “Can you show us examples of corporate headshots with clean, even lighting and a neutral backdrop?”
- Gear & Setup: “Do you own or have consistent access to a softbox or octagonal light modifier for flattering, shadow-free light?”
- Process Understanding: “How do you typically direct non-models to achieve natural, confident expressions?”
- File Delivery: “What is your standard turnaround time, and do you provide both high-res and web-optimized files?”
- Backup Plan: “What is your contingency if equipment fails or a key team member is unavailable on shoot day?”
After picking your photographers, you need to talk clearly. Describing light can vary by location. Your lighting spec sheet is key here. It’s like a recipe for consistent results.
Your spec sheet should be easy to understand. Describe the light you want in simple terms. Include a diagram or photo if needed. This ensures your geographically dispersed teams look like they were shot in the same place.
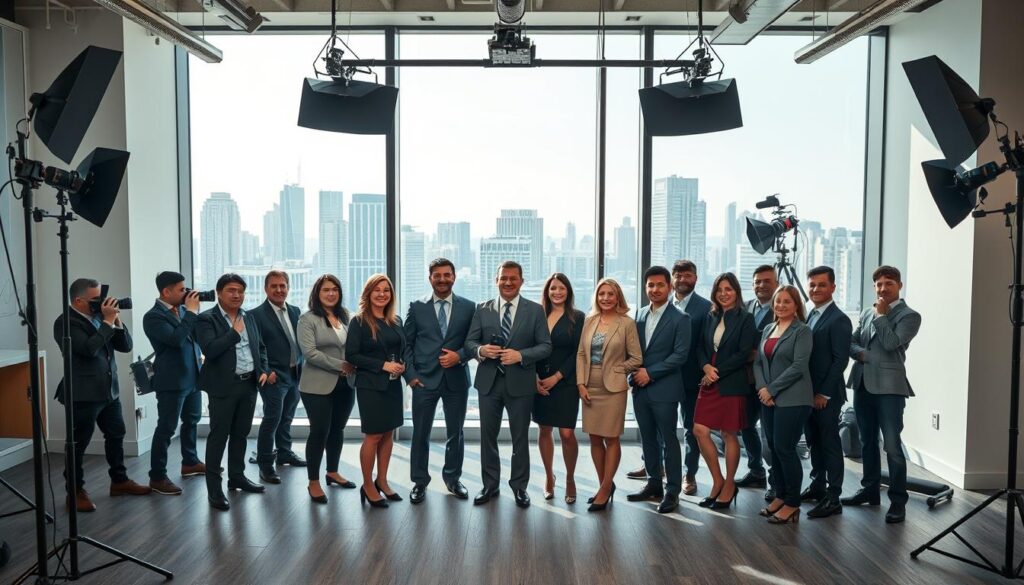
The last step is Quality Assurance (QA). Never assume photos are ready for use. Create a three-step review process:
- Technical Check: Check focus, exposure, and color. Are the whites white? Is the image sharp at 100% zoom?
- Style Guide Adherence: Compare the image to your style guide. Does it match?
- Final Approval: Have one person approve the images before they’re used. This could be your marketing lead.
By following these steps, you can manage a multi-city rollout smoothly. Your brand looks united, and your multi-location teams feel part of the company culture. Ready to see how others have done it? Check out our customer stories on streamlining visual branding for multi-location teams.
Legal & Licensing: usage rights, contracts, NDAs
Understanding usage rights and contracts is like having an insurance policy for your visual brand identity. It’s the essential backend work that protects your investment, ensuring your professional images are used correctly and legally. Let’s make these concepts clear and actionable, so you can move forward with confidence.
First, let’s talk about usage rights. This term simply defines what you’re allowed to do with the photographs you’ve paid for — think of it as the rulebook for your images. Knowing your rights helps you avoid misunderstandings, maximize the value of your content, and maintain control over how your personal or corporate brand is represented.
Just like a traveling sketchbook library, where artists carry their tools and refine their craft wherever they go, understanding usage rights allows you to experiment, adapt, and expand your visual assets safely. Each agreement, clause, or contract detail acts like a guide, ensuring that your images support your brand exactly as intended while protecting your creative and professional investment.
Photographers typically grant licenses, not sell the image itself. Here are the most common types:
- Royalty-Free: You pay once and can use the image almost anywhere, forever. It’s flexible and cost-effective for ongoing marketing.
- Rights-Managed: The license is specific. It might limit use to your website for one year or exclude large print runs. This offers more control and is often used for high-value campaigns.
- Exclusive License: You get sole rights to use the image. The photographer cannot license it to anyone else. This is key for a defining leader portrait or a major product launch.
Always negotiate usage rights before the shoot. Be specific about your needs: company website, social media, investor decks, print brochures, and global advertising. A clear agreement prevents surprises later!
Next, your photography contract. This document is your project’s blueprint. Don’t just skim it! Look for these key clauses:
Scope of Work: This should detail exactly what’s being delivered—number of final images, formats, and the shot list. If it’s not written down, it’s not guaranteed.
Usage Grant: This section should mirror the usage rights you discussed. Verify the mediums, duration, and territories are correctly listed.
Indemnification: This is a big one. It means the photographer promises the images don’t violate anyone else’s copyright. It protects you if a legal issue arises from their work.
Cancellation/Rescheduling: Life happens. Understand the fees and notice periods involved if you need to change the date.
Lastly, consider a Non-Disclosure Agreement (NDA). An NDA is your shield for confidential projects. You might need one if your shoot involves an unannounced product, a sensitive executive transition, or a full brand rebrand you want to keep under wraps.
It ensures everyone on set—photographer, assistants, stylists—keeps your plans confidential. It’s a standard request for high-stakes projects, and reputable vendors will understand.
Treating legal and licensing as a core part of your planning isn’t about distrust. It’s about professionalism. Clear contracts and rights protect your brand’s assets and foster great, long-term partnerships with creative vendors. Now you’re equipped to handle this like a pro!
Crisis or Rebrand Scenarios: fast refresh plan
Imagine needing to update your entire executive team’s imagery in a matter of days. This is where a fast refresh plan becomes non-negotiable. Whether it’s a merger, a public relations pivot, or a strategic rebrand, these moments demand agility. Your visual leadership brand must shift seamlessly to reflect the new reality.
Waiting is not an option. Inconsistent or outdated photos during a transition can signal internal chaos to the outside world. A pre-built contingency plan lets you lead with visual confidence and cohesion, even in turmoil.
Building this plan is simpler than you think. It revolves around preparation and clear protocols. Let’s walk through the key steps to create your own rapid-response imagery toolkit.
First, identify your priority subjects. Not every photo needs an immediate update. Create a shortlist of key leaders—your CEO, founders, and public-facing executives. Include team photos for departments central to the rebrand message. This focus saves precious time and resources.
Next, have your creative partners on speed dial. Cultivate a relationship with a trusted photographer and stylist who understand your company’s core aesthetic. Consider a retainer agreement for crisis scenarios. This ensures availability and eliminates lengthy vendor vetting when the clock is ticking.
This is where your existing style guides become a superhero. That documented playbook for backdrops, crops, and lighting is now your decision accelerator. You won’t waste hours debating options. Simply reference the guide and execute. It ensures all new visuals instantly feel part of the same family.
Lastly, establish a rapid approval workflow. Designate a small, decisive team—often the CEO, CMO, and a brand lead—to review and approve shots within a 24-hour window. Avoid large committees that slow down the process.
Think of your fast refresh plan as an insurance policy for your leadership brand. When change strikes, you’re not starting from scratch. You’re executing a rehearsed play. This preparedness transforms a potentially visual crisis into a showcase of your organization’s resilience and strategic clarity.
Measuring Impact: PR pickup, investor decks, website consistency
How do you measure the success of your visual brand investment? The proof is in tangible results.
Consistent, high-quality executive photos directly increase PR pickup. Journalists and editors are drawn to professional imagery that tells a clear story. Your team’s photos become assets that get used.
In your investor decks, powerful portraits build instant credibility. They convey stability and vision before you say a word. This visual trust can be a silent partner in your pitch.
For multi-location teams, a unified visual style guide is key. Audit your website and bios. Does every page show a cohesive brand story? Consistency across all touchpoints signals a professional, organized company.
Tracking these metrics shows a clear return on investment. Great photos work for you every day. They build your brand from the inside out.
Looking for Success Stories & Expert Advice? Learning from others who have done this well can fast-track your own results. Remember, the right preparation pays off, as detailed in this guide on why time matters for your headshot.
Your visual brand is not an expense. It’s a strategic tool for growth.