
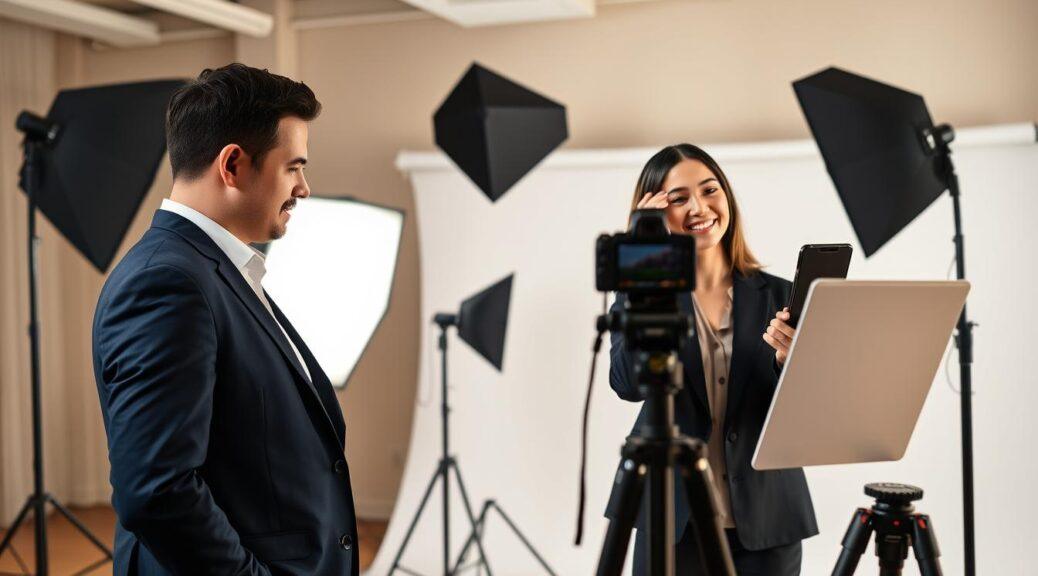
Let’s be brutally honest. Showing up to a professional photography session unprepared is like wearing sweatpants to a board meeting. It’s not a good look.
This isn’t about vanity. It’s about visual strategy. In a world that scrolls fast, your image is like a non-verbal handshake. It’s your silent thesis statement before you say a word.
Why a 30-day game plan? Because in our instant-gratification society, we’ve forgotten that quality takes time. You wouldn’t manage a critical project at work with a last-minute scramble. Your personal brand deserves the same respect.
This guide is your project management blueprint. We’re trading luck for intelligent design. Get ready to become strategically photo-ready.
Pre-Session Timeline: 30-Day Countdown for Perfect Headshot Preparation
Forget the night-before panic. True photo session prep is a four-week campaign of incremental, intelligent upgrades. It’s the difference between showing up and showing off. As client Rick Joi noted, the value lies in knowing “just what to do to prepare.” This phased approach systematically dismantles anxiety, mirroring how we’d prepare a major client pitch—with research, rehearsals, and polish.
Week 4: The Brand Audit & Inspiration Sprint. This is your strategic foundation. Your task isn’t to pick a shirt; it’s to define the persona you’re photographing. Are you the innovative disruptor or the trusted advisor? This week, treat Pinterest and Instagram like a corporate R&D department. Collect images that resonate with your target audience’s subconscious. This isn’t procrastination; it’s building a visual brief for your photographer, giving them the “clear and streamlined” direction Allison Reilly praised.
Week 3: The Logistics Lock-In. Strategy meets calendar. Now you execute. Book that haircut or color for about 7-10 days before the session—fresh but settled. Finalize your photographer brief with your inspiration board. Begin the wardrobe deliberation in earnest. Try things on under realistic lighting. This week is about setting parameters, eliminating last-minute chaos, and owning the process.
Week 2: The Dry Run. This is where theory gets stress-tested. Start testing any new skincare products *now*. Your face is not a laboratory for untested serums on session eve. Practice your expressions in a mirror. Ditch the “cheese.” Aim for the subtle, confident look you use when listening to a colleague’s smart idea. Pack your session bag with outfit options, grooming tools, and those wardrobe essentials. Think of it as a dress rehearsal.
Week 1: The Polish. The heavy lifting is done. Now, you refine. Hydration becomes non-negotiable—water over wine. Protect your sleep like it’s a trade secret. This is also the time for mental rehearsal. Visualize the session going smoothly. This final phase isn’t about doing more; it’s about being more—rested, hydrated, and mentally present. It’s the final, critical layer of preparation that translates directly into a relaxed, authentic performance in front of the lens.
This 30-day timeline transforms the process from a source of stress into a structured project. It acknowledges our collective tendency to procrastinate while providing the guardrails for success. By the time session day arrives, you’re not scrambling. You’re simply executing a plan you’ve already mastered.
Skincare Routine: Professional Glow Tips for Camera-Ready Complexion
Think of your skin as the canvas, not the painting—a principle that becomes painfully clear under the scrutiny of a high-resolution lens. Today’s cameras are forensic tools, not forgiving friends. They see the texture, the subtle redness, the dehydration lines your morning mirror glossed over. This isn’t about achieving Instagram-filter perfection. It’s about strategic professional photo planning to create a calm, cooperative surface.
Your goal? To make the photographer’s and retoucher’s job delightfully easy. Let’s be clear: that natural glow you see in great headshots is often a carefully engineered illusion. It starts with a solid foundation, weeks before the shutter clicks.
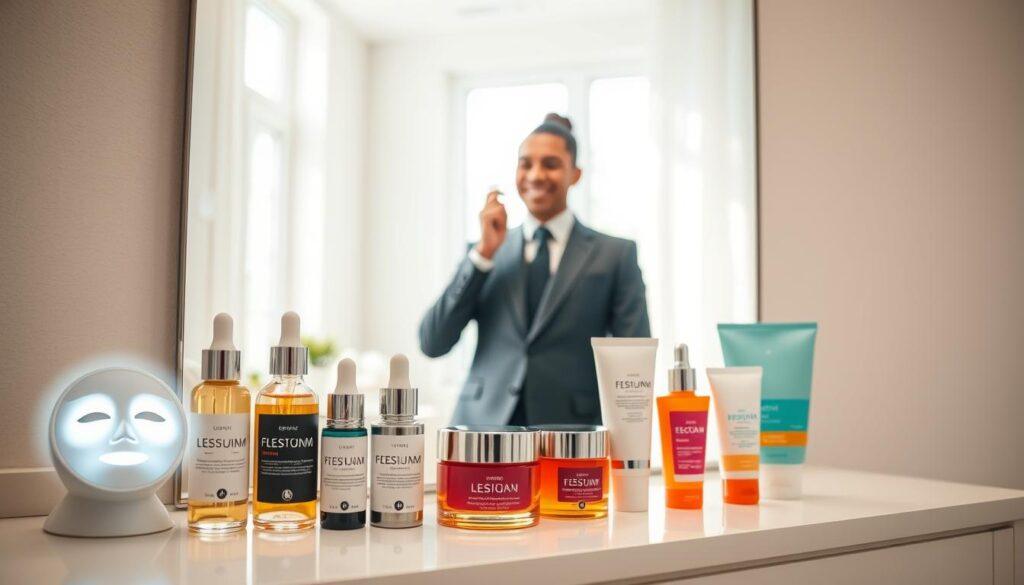
The most important rule in your pre-shoot skincare playbook is simple: do not introduce new products. Now is not the time for a miracle acid or a trendy snail mucin. Your skin needs stability, not surprise. A bad reaction can take weeks to calm down, blowing your entire timeline. Stick with your known, trusted basics.
Hydration vs. The Illusion of Plump
There’s a critical difference between true hydration and temporary plumping. One builds a resilient canvas. The other is a fleeting facade the camera might see right through.
| Factor | True Hydration | Temporary Plumpers |
|---|---|---|
| Mechanism | Increases skin’s water content from within over time. | Draw water to the surface or cause mild swelling. |
| Key Ingredients | Hyaluronic Acid, Glycerin, Ceramides (used consistently). | High-concentration HA serums, topical niacinamide (one-time use). |
| Timeline for Effect | Builds over days and weeks of consistent use. | Noticeable within hours, fades within a day. |
| Camera Readiness | Creates a smooth, even, and supple base that lasts. | Can look great initially but may appear uneven in harsh light. |
For your professional photo planning, focus on the left column. Start drinking water and using your hydrating moisturizer with religious consistency at least three weeks out.
Myths, Debunked with Prejudice
Let’s dismantle some bad internet advice, shall we?
- Toothpaste is not a spot treatment. It burns, irritates, and can create a red, flaky mess that’s impossible to conceal.
- Scrubbing harder does not equal cleaner skin. It causes micro-tears and inflammation—exactly what the “unforgiving” lens loves to highlight.
- A “tan” is not a substitute for even tone. A spray tan can settle in pores and lines. A real tan is skin damage. Aim for your natural, healthy color.
The Pragmatic Multi-Week Plan
Here is your no-nonsense timeline for a camera-ready complexion:
- 4+ Weeks Out: Lock in your routine. If you see a professional, do any mild facials now. Address any major concerns with a dermatologist.
- 3 Weeks Out: Cease all experimentation. Prioritize hydration inside and out. Gently exfoliate 1-2 times per week to promote cell turnover.
- 1 Week Out: Avoid harsh actives (retinoids, strong acids). Focus on soothing and barrier-repair ingredients. Get ample sleep.
- 2-3 Days Out: Do a hydrating face mask. Avoid salty foods and excessive alcohol to minimize puffiness.
- The Night Before: Apply your normal moisturizer. Go to bed early. Do not try anything new.
The Day-Of Protocol
This is where the data point becomes law. Prior to arriving at the session, your face should be clean, without makeup, and moisturized. Use your gentle cleanser and your daily moisturizer. That’s it. Come with a bare, hydrated face. This gives the makeup artist the perfect canvas to work on and ensures no product residue interferes with the application.
This level of preparation is what separates an okay headshot from a powerful one. It’s the behind-the-scenes work that translates into effortless confidence on camera. For more insights on posing and session flow, explore these essential headshot tips.
Remember, the goal of this skincare strategy isn’t to look like someone else. It’s to look like the most refreshed, confident, and clear-skinned version of you. You’re not hiding from the HD reality. You’re preparing to meet it on your own terms.
Hair Planning: Styles That Photograph Well and Professional Grooming Guidelines
Your hair in a headshot is like the supporting actor, not the star. Unless you’re in a rock opera, then go for it. For the rest of us, we aim for a style that frames the face well, not too much. The camera is very honest. It makes things look flat, contrasts too much, and can turn “artfully messy” into “just survived a wind tunnel.”
To win, plan with photographic logic, not just how you look in the mirror.
A key truth from pros: your hair should be tidy, clean, and done how you want it. A photographer’s team is for polish, not a full style change. You set the foundation.
Let’s look at what works on camera and what doesn’t.
- Photographs Well: Styles with defined shape, texture, and volume at the crown. Think soft layers, natural movement, and sharp, clean lines for shorter cuts.
- Becomes a Distraction: Overly complicated updos, styles with too much height at the front, or stiff looks. Also, super-slicked, gelled looks can look old-fashioned.
The debate: fresh cut the day before, or a cut with a week to settle? I’ve figured it out. For most men, a cut 2-4 days prior is best. It softens sharp lines and lets natural texture show, avoiding that “just-escaped-the-barber” look. For women, fresh blunt cuts can be too severe, while settled layers look better.
Grooming guidelines are practical. For men, it’s about sharp lines and managed texture. A well-defined neckline and sideburns are key for authority. For women, it’s about volume and movement. Flat hair means a flat image. Strategic layers and a blow-out that lifts at the roots add dimension the camera loves.
Why does a certain bob scream “CEO” while another whispers “creative director”? It’s about cultural canon. A sleek, chin-length bob like Christine Lagarde’s projects control. Reese Witherspoon’s softer, textured waves blend approachability with competence. Your style should be timeless, but knowing these visual cues is powerful.
Planning your grooming appointments with military precision is key. A part of your strategic timing for business headshot readiness is syncing your haircut, color touch-up, and brow shaping. This way, you look like the best, most authentic version of yourself—a version the camera wants to capture.
Wardrobe Selection Process: Choosing Outfits That Photograph Beautifully and Reflect Brand
Forget the ‘what to wear’ anxiety. Your headshot wardrobe is a mix of psychology, photography, and brand strategy. It’s not just about looking good. It’s about showing authority and being approachable before you say a word. Deb Schell said the right outfit makes you feel confident, and your photographer can make it even better with the right poses.
Color is key to reaching your viewer’s subconscious. We’re moving past the old “wear solids” advice. Think about your brand: does it show trust and stability? Navy or slate blue is perfect. For creativity, deep burgundy or emerald green works well. But avoid stark white, as it can blow out the camera’s exposure.
Texture adds depth and interest. A wool blazer shows substance and reliability. Linen suggests creativity. The fabric of your outfit tells a story. Is your suit a “corporate costume” or does a soft-cotton knit show your true leadership style?

Now, let’s talk about common wardrobe mistakes. Busy patterns can create a disorienting effect on camera. Trendy pieces will soon look outdated. Ill-fitting clothes add pounds. These mistakes confuse your message, not clarify it.
To avoid these mistakes, bring options. This is one of the top entrepreneur photo tips. Marc, a photographer, offers a detailed wardrobe guide and suggestions. Rick Joi found value in his photographer’s help in choosing the best outfits for different backgrounds. Trust your photographer’s expertise in fabrics and colors.
| Fabric Type | Photographic Effect | Brand Vibe | Pitfalls to Avoid |
|---|---|---|---|
| Wool & Tweeds | Adds rich texture and depth; absorbs light softly. | Classic, authoritative, trustworthy (Finance, Law, Consulting). | Can look heavy in warm lighting; avoid overly bulky weaves. |
| Linen & Cotton | Creates a soft, matte finish; suggests ease and comfort. | Creative, approachable, authentic (Tech, Coaching, Creative Arts). | Wrinkles easily; ensure it’s freshly steamed, not crumpled. |
| Silk & Satin | Provides subtle sheen and highlights; draws the eye. | Luxurious, sophisticated, detail-oriented (Luxury Brands, Design). | Reflective surfaces can create glare; test under lights. |
| Knits & Fine-Gauge Sweaters | Offers a soft, enveloping look; very forgiving. | Warm, empathetic, relatable (Healthcare, Wellness, Education). | Loose weaves can look sloppy; opt for fine, structured knits. |
The goal is to wear something that feels like a second skin, not a disguise. When you feel confident in what you’re wearing, it shows. Your posture relaxes, and your smile becomes genuine. This turns a standard headshot into a powerful brand asset. So, curate your options, trust your photographer’s expertise, and remember: your wardrobe is a key part of your visual story. Mastering this selection is a must for professional entrepreneur photo tips.
Sleep and Wellness: Physical Preparation for Looking and Feeling Your Best
The best photo editing software can’t beat the look of tired eyes. You can’t Photoshop away real energy. For your headshot preparation, the key tool isn’t a software slider; it’s a good night’s sleep. This section fights against the “hustle culture” that makes us show up tired to important moments.

Let’s talk about how our bodies work, not magic. Stress makes our bodies release cortisol. This hormone is great for running but bad for photos. It makes our eyes puffy, skin dull, and causes inflammation.
Our clients’ experiences are not just about personality; they’re about how we feel. Kelly Whalen felt “comfortable, taken care of, and heard,” and Leslie Wireback felt “very comfortable and at ease.” This feeling affects how we look. You can’t fake it.
Think of the week before your shoot as your “pre-game.” It’s not about a harsh detox. It’s about smart, lasting wellness that improves your photos. Treat your body like an athlete, but for a photo shoot. You need to tune it.
Hydration is key. Start drinking more water at least five days before. It’s not about drinking a lot the day of. Drinking water regularly makes your skin look better from the inside out.
Next, watch out for bloat. Salt is a big culprit. Avoid processed foods and salty snacks. Eat foods like bananas, spinach, and avocados that help balance fluids. It’s about smart eating, not cutting out everything.
Also, move gently but regularly. Don’t start a new intense workout routine. Just walk, do yoga, or stretch. It helps your posture, gets rid of stress, and improves your look.
This whole process shows you respect yourself. It tells your mind that this headshot preparation is important. When you’re well-rested and hydrated, you feel different. The photographer can then capture your real confidence, not just try to hide your tiredness.
Mental Preparation: Confidence Building and Mindset Strategies for Natural Photos
We’ve planned your skin, hair, and wardrobe. Now, it’s time to work on your mindset. The most overlooked part of photo session prep is your mental state. That “deer in headlights” look? It’s a sign of anxiety, not a judgment on your looks.
Your body and outfit are ready. But if your mind is racing, it shows. The goal is to be yourself, not to pose.
Client testimonials show the secret. Jane Gober loved her photographer’s calm. Kristi Wasson felt at ease, showing her true self. Katrina Driver “felt seen and empowered.” This feedback is key. A photographer who makes you feel comfortable is priceless.
But it’s a team effort. You can’t just wait to be relaxed. You must help your photographer. Your job is to let go of self-doubt. Their job is to guide you.
Strategy 1: Visualize the Interaction, Not the Image. Stop worrying about a good headshot. Think about having a great conversation with your ideal client. Imagine their reactions. Your expression will follow naturally.
Strategy 2: Borrow from Science with Power Poses. It’s real. Standing confidently for two minutes can lower stress and boost confidence. Do this before your session. It helps you feel more assertive.
Strategy 3: Reframe the Photographer. They’re not judging you. They’re a creative partner, coach, and expert. Trust their advice. If they say “tilt your chin,” it’s to find the best light.
This change in mindset makes a big difference. Here’s how:
| Mental Focus | Internal Dialogue | Physical Result |
|---|---|---|
| On Self-Consciousness | “Do I look awkward? Is my smile weird?” | Stiff posture, forced smile, tense eyes. |
| On External Connection | “I’m sharing my expertise with someone who needs it.” | Relaxed shoulders, genuine eye spark, natural warmth. |
| On Being Judged | “The photographer is analyzing my every flaw.” | Defensive body language, a “frozen” appearance. |
| On Collaborative Creation | “We’re a team making a powerful brand asset.” | Open posture, varied expressions, dynamic energy. |
Rev. Dr. Thaeda Franz found her shoot empowering. That’s what you aim for. Empowerment comes from feeling in control. In a photo session, you control your mindset.
So, how do you show your true self? Practice. Before your session, take five minutes to focus. Breathe deeply. Think of a recent success. Let that confidence carry you into the studio.
The best photo session prep tip is to let go of perfection. Aim to look engaged. Your confidence is more compelling than your looks. Walk in with confidence and become more than just photo-ready. You become story-ready.
Technical Preparation: Understanding the Process and What to Expect During Your Session
Going to a photo studio without knowing what to expect is like going to a meeting without the agenda. It’s all about reacting, not working together. Learning about the process is key to smart professional photo planning.
Knowing what’s going on can really help. It turns you from just a subject into a team player. Let’s go over what usually happens so you know what to expect.
Your session starts with a warm-up. You’ll meet the team and have a quick chat. A good photographer will really get to know your business and vision. This is more than just small talk.
Then, you’ll review your outfits. The photographer or stylist might suggest changes based on the lighting. After that, it’s time for hair and makeup touch-ups. The goal is to refine, not change everything.
Next, the photographer will start with some easy shots to get you comfortable. They’ll help you find the right pose and expression. Your job is to relax and be yourself. Their job is to guide you.
This is like a director working with an actor. You bring the real emotions, and they capture them perfectly. The magic happens when you work together.
Now, let’s talk about the technical stuff without using hard terms. Backdrop and lighting are two important things. Your backdrop can say a lot about your brand. A simple gray wall can show you’re professional, while a textured bookshelf can show you’re creative.
Choosing the right backdrop is part of your brand strategy. Try to match it with your brand colors for a cohesive look. Lighting is also key. It can make your photos feel soft and friendly or bold and dramatic.
You’ll also decide between a studio or a location shoot. Each has its own feel and needs.
| Factor | Studio Shoot | Location Shoot |
|---|---|---|
| Control | Maximum. Lighting, sound, and backdrop are perfectly managed. | Variable. Depends on weather, ambient light, and public access. |
| Vibe | Polished, classic, and distraction-free. | Authentic, contextual, and tells an environmental story. |
| Logistics | Simple. Everything is in one dedicated space. | Complex. Involves travel, permits, and power sources. |
| Brand Alignment | Ideal for finance, law, or any brand valuing precision. | Perfect for creatives, realtors, or brands rooted in a place. |
Knowing about the process and these choices does more than calm your nerves. It makes you a proactive partner. This knowledge helps you avoid common mistakes that jeopardize your image and prepares you for the final steps.
You don’t need to use the camera yourself. You just need to understand what it can do and what you can do with it.
Props and Accessories: What to Bring and What the Photographer Typically Provides
A well-chosen accessory can add context to your photo. But, a bad one can make your photo look generic. It’s important to choose props that enhance your story, not overshadow it.
When deciding what to bring, ask yourself three questions:
- Does it add authentic context? (Your custom-built product, yes. A random, shiny apple, no.)
- Is it fiercely on-brand? (A architect’s blueprint roll, yes. A generic hard hat from a Halloween store, no.)
- Does it complicate or clarify your story? (A unique tool of your trade clarifies. A cluttered desk background complicates.)
Choosing props is not about hiding your personality. A great photographer can make a unique prop work well. The key is to use props intentionally.
Choose items that reflect your professional identity. These props add depth to your photos.
Tech as a Tool: Bring your actual laptop, tablet, or notebook. They show your tech-savviness.
Professional Signature Items: A favorite pen or a well-worn tool tells a story about your skills.
Personal Tokens: A meaningful piece of jewelry or an heirloom watch adds authenticity. A photographer’s insight on using these items is invaluable.
What Your Photographer Typically Provides
Your photographer is your partner, not your prop supplier. They have the right equipment to make you look great. They focus on light, shadow, and angle, not on finding your favorite mug.
Explore this guide on essential photographer gear to understand their toolkit. Their flexibility is for your ideas, not their lack of preparation.
The Great Accessory Debates: Glasses & Jewelry
Glasses: Wear them if they’re part of your identity. Non-coated lenses can create distracting spots from studio lights. Consider getting a pair with anti-reflective coating or be prepared for careful angling.
Jewelry: Keep it simple and meaningful. A statement piece can work, but avoid anything that jangles or reflects light too much. The goal is to frame your face, not to fund a jeweler’s retirement.
| Prop Category | Bring It If… | Leave It If… | Pro-Tip for Readiness |
|---|---|---|---|
| Tech (Laptop, Tablet) | It’s integral to your work and is clean, modern, and powered on with a neutral screen. | It’s a generic prop, covered in stickers, or has a cracked screen. | This demonstrates tech-savvy business headshot readiness. |
| Professional Tools | The tool is specific to your craft and tells a story about your skill (e.g., a chef’s knife, a caliper). | It’s generic, overly large, or requires a safety briefing to handle. | Hold it naturally, as you would while working, not posing. |
| Personal Tokens | The item has deep personal meaning and doesn’t visually clash with your outfit. | It’s sentimental but visually busy (e.g., a locket with tiny pictures). | Be ready to explain its significance to your photographer for authentic captures. |
| Generic Items (Mugs, Books, Plants) | Almost never. The mug is your branded company merch; the book is your actual published work. | It’s a stock photo stand-in you grabbed just to have “something.” | When in doubt, apply the three-question framework. You’ll usually have your answer. |
The ultimate editing principle is ruthless. Bring a few meaningful options, then let your photographer help you curate. Sometimes, the most powerful prop is you—your expression, your confidence, your story. Choosing accessories isn’t about filling empty hands; it’s about completing a visual sentence you started the moment you decided to invest in your professional image.
Day-of Checklist: Final Preparations for a Smooth and Successful Photo Session
You’ve spent thirty days getting ready. Now it’s time to show off. Think of today as a performance, not a test. Your final entrepreneur photo tips are all about doing it right.
This checklist is your backstage kit. It’s not just a list of tasks. It’s a set of tools to help you stay in control. As Allison Reilly learned, being professional from the start is key. Your hard work ensures the day goes smoothly, just like Paul Hodge found.
Pack your outfit steamer. Wrinkles are for deep thoughts, not your brand. Have a backup outfit ready. Cameras see things differently than we do. Drink water and eat quiet snacks that won’t make you bloated. Make a playlist that gets you in the right mood. These tips turn nerves into energy.
Your most important tool isn’t in your bag. It’s your mindset. Walk in ready to work with your photographer. You’ve got your look ready. Now, get ready to follow directions, play, and try new things. The session is a conversation.
You’ve done the hard work. You’ve built a personal brand worth showing off. Now, are you ready to let the camera capture what you’ve created?