
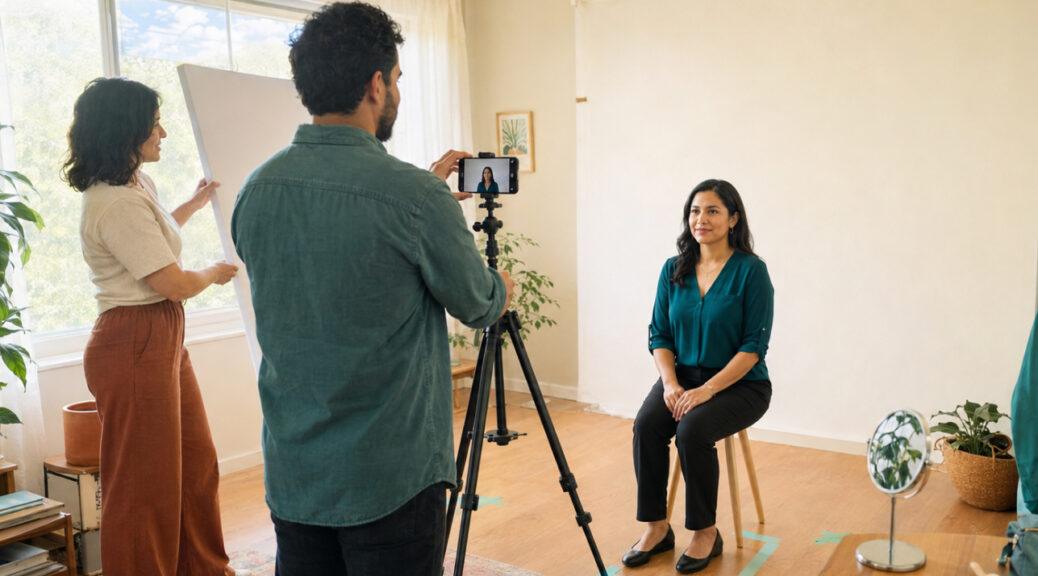
A passport photograph is designed for identification, not glamour. It must show a clear, current, and accurate view of your face under tightly controlled conditions. Additionally, how to look better in a passport photo is about proper lighting, neutral expression, and steady framing.
Additionally, the best passport-photo improvements happen before the shutter is pressed.
Even lighting, clear camera placement, and neat hair show how to look better in a passport photo.
They do so without changing your features or risking rejection.
The subject is especially timely in 2026. The U.S. Department of State began accepting applications for its commemorative America250 passport on July 6. The special edition uses the standard passport application process and photo requirements, meaning applicants still need a compliant, recent image regardless of which passport design they request.
The State Department says unacceptable photographs are the leading reason passport applications are placed on hold. Its guidance prohibits filters, artificial intelligence, digital retouching, replaced backgrounds, and other changes that alter a person’s natural appearance. These standards emphasize preventing subpar images from entering the process.
Therefore, the goal is not to repair the image afterward; it is to create a better original photograph. In practical terms, how to look better in a passport photo starts with clear lighting and a neutral backdrop. This approach aligns with the guidance and helps applicants meet the standard on the first attempt.
Know the Rules Before Trying to Look Better
A flattering photograph that fails the technical requirements is not useful. Before thinking about clothing, hair, makeup, or expression, make sure the basic setup meets the official rules.
For a paper application, the photograph must be in color, measure 2 by 2 inches, and have been taken within the previous six months. The distance from the bottom of the chin to the top of the head must measure between 1 inch and 1⅜ inches, or approximately 25 to 35 millimeters.
You must face the camera directly with your head centered and not tilted. Both eyes must be open and visible, the full face must remain unobstructed, and the background must be plain white or off-white without texture, objects, lines, or shadows. The State Department’s current passport photo requirements also require an original, unedited image.
| Photo Decision | Helps Your Appearance | Risks Rejection |
|---|---|---|
| Soft, even frontal lighting | Reduces harsh shadows and uneven skin tone | Strong side light, overhead shadows, overexposure |
| Camera several feet away | Produces more natural facial proportions | Close handheld selfie distortion |
| Neutral or subtle closed-mouth smile | Creates a relaxed expression | Open mouth, exaggerated smile, closed eyes |
| Simple everyday clothing | Keeps attention on the face | Uniforms, camouflage, clothing resembling a uniform |
| Neat hair with eyes visible | Frames the face clearly | Hair covering the eyes or part of the face |
| Original photograph | Preserves accurate identification | Filters, AI edits, skin smoothing, digital background replacement |
Meeting these requirements first gives you room to improve the image through photography rather than editing.
How to look better in a passport photo: Improve the light instead of smoothing the skin
Lighting has a greater effect on a passport photograph than almost any beauty filter. Poor lighting exaggerates under-eye shadows, uneven texture, shine, redness, and facial asymmetry. Balanced light makes the same face appear more rested and natural.
The State Department requires uniform lighting that reproduces skin tones accurately and does not create shadows on the face or background. It specifically warns against overhead lights and lights positioned too far to one side because they can obscure facial features. It also advises applicants to correct exposure and white balance before taking the photograph rather than editing the result afterward.
At home, face a large window that receives soft indirect daylight. Stand several feet inside the room rather than directly against the glass. The photographer should stand between you and the window without blocking the light.

Avoid direct midday sunlight, which creates sharp shadows beneath the brow, nose, and chin. If the window light is stronger on one side of the face, place a white poster board or plain white foam board on the darker side to reflect a small amount of light back toward you.
Two matching lamps can also work when daylight is unavailable. Position them slightly above eye level and approximately 45 degrees to either side of the camera. Keep the lamps at similar distances and use bulbs with the same color temperature. Mixing a warm household bulb with cool window light can create unnatural yellow and blue areas across the face.
Do not rely on a direct phone flash. It can create red eye, reflective skin, flat facial contours, and a dark background shadow. The State Department advises taking a new photograph if red eye appears rather than digitally correcting it.
Move Away From the Wall
Standing directly against a white wall may seem like the easiest way to create a compliant background, but it often produces a visible shadow around the head and shoulders.
Instead, stand approximately three to six feet in front of the background. This separation allows light to fall more evenly and reduces the likelihood that your body will cast a dark outline on the wall.
The camera should also be several feet away. The State Department’s current examples recommend a distance of roughly 1.2 meters, or about four feet, as a starting point. The final image can be cropped afterward using the application system or the official cropping tool, provided the photograph itself is not digitally altered.
Distance matters for appearance as well as compliance. A camera held close to the face exaggerates the nose and center of the face while making the ears and sides of the head appear smaller. This is one reason handheld selfies often look different from a person’s reflection.
Using a moderate camera distance produces more natural proportions. A phone’s rear camera is usually preferable to its front-facing camera because it often provides better resolution and less aggressive automatic processing. Ask another person to take the photograph or secure the device on a stable tripod at eye level.
Keep the Camera at Eye Level
Camera height influences the apparent shape of the face. A camera positioned too low can emphasize the chin and nostrils. A camera placed too high may make the forehead look larger while changing the angle of the eyes and jaw.
Place the lens level with the subject’s eyes or only slightly above them. Keep it parallel to the face rather than tilted upward or downward.
Stand or sit upright with the spine lengthened naturally. Bring the shoulders back slightly, but do not force them into a rigid military posture. The shoulders and head should face the camera squarely.
A useful technique is to imagine the top of the head being lifted gently upward while the chin moves a fraction forward and then slightly down. This can define the jaw without creating an obvious pose or head tilt. The movement should be minimal because the official requirement remains a direct, full-face view.
Check that the head is centered and fully visible. Hair may extend beyond the crop boundaries in some cases, but the entire head must be shown and appropriately sized.
Choose Clothing That Creates Clean Contrast
Only the upper portion of your clothing will appear in a passport photograph, but that small area affects how clearly the face separates from the background.
A white or very pale shirt can blend into the required white or off-white background, making the shoulders less distinct. Medium or dark colors usually create clearer separation.
Deep blue, charcoal, forest green, burgundy, muted teal, and warm brown often photograph well against a pale background. Solid colors are generally easier to control than busy patterns, reflective fabrics, or very narrow stripes.
Choose a neckline that frames the face without sitting too close to the jaw. A simple crew neck, modest V-neck, open collar, or structured blouse can create a clean shape beneath the face. Make sure the garment sits correctly before the photograph is taken, because a twisted collar or uneven neckline can become surprisingly noticeable in a symmetrical head-and-shoulders composition.
The State Department does not allow uniforms, clothing that resembles a uniform, or camouflage clothing in passport photographs. Normal religious attire is handled separately under the rules for religious dress and head coverings.
There is no requirement to wear formal clothing. A suit jacket may look polished, but it is not necessary. The most effective choice is usually a familiar, well-fitting garment in a color that contrasts with the background and does not distract from the face.
Prepare Hair for Visibility, Not Perfection
Hair should look like your normal hair, but it should not obscure your eyes or important parts of your face.
Before the photo session, arrange loose strands that may fall across the eyes. Check both sides of the face because the front-facing composition makes differences in hair placement more obvious than they may appear in a mirror.
People with long hair can wear it down, behind the shoulders, or partially pulled back. The important issue is facial visibility, not a particular style. Natural volume is acceptable as long as the entire head remains within the image and is properly sized.
Avoid making a dramatic haircut or unfamiliar hairstyle immediately before the photograph solely because it seems more formal. A passport photograph may remain in use for years, and looking recognizably like yourself is more valuable than following a temporary trend.
If you use styling products, apply them lightly enough to avoid an unusually wet or reflective appearance under the lights. Check for flyaways, but do not plan to erase them later with retouching software. Digital changes to the outline of the head, face, or neck can make a photograph unacceptable.
Use Makeup to Control Shine, Not Redesign the Face
The published passport rules do not require applicants to avoid ordinary makeup. They do require the photograph to reflect the person’s current appearance and remain unedited.
For a natural result, use makeup as you normally would rather than attempting a dramatic transformation specifically for the photo. A light layer of translucent powder can reduce shine on the forehead, nose, and chin. A small amount of concealer can soften temporary redness or under-eye discoloration before the photograph is taken.
Avoid very heavy contouring designed for stage lighting or social-media photography. Passport lighting is flat and frontal, and exaggerated contour can appear harsher than expected. Strong highlighter may create bright reflective patches that resemble overexposure.
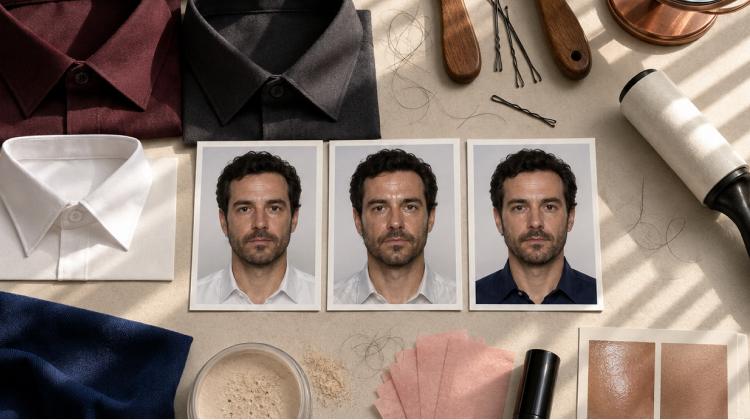
Keep foundation close to the natural color of the face and neck. A visible difference between facial and neck color is difficult to ignore in a centered identification photograph.
Eye makeup should not obscure the natural shape of the eyes. Since the irises and pupils must be visible, overly heavy lashes or makeup that creates deep shadows around the eyes may work against the clarity requirement.
Lip color can be worn, but a tone close to your usual appearance will generally age better over the life of the document. The goal is to look rested and recognizable, not digitally perfected.
Practice a Relaxed Passport-Safe Expression
Many passport photographs look uncomfortable because the subject is concentrating so hard on being neutral that the face becomes tense.
The safest expression is a relaxed, neutral face with both eyes open and the mouth closed. Current State Department examples also state that a smile is permitted as long as it is natural, the eyes remain open, and the mouth stays closed.
Before the photograph, take a slow breath and release tension from the jaw. Pressing the teeth together can make the lower face appear rigid. Let the tongue rest naturally and keep the lips together without squeezing them.
Look directly into the lens rather than at the photographer’s face, your own image on the screen, or a point beside the camera. If you tend to blink when the shutter is pressed, ask the photographer to count unpredictably or take several frames in quick succession.
A subtle closed-mouth smile can prevent the expression from looking severe, but it should not become a fashion pose. Avoid lifting one eyebrow, turning the head toward a preferred side, raising the chin, or using the three-quarter angle that may look flattering in portraits. Passport photographs require the full face to point directly toward the camera.
Remove Glasses and Distracting Accessories
Eyeglasses, sunglasses, and tinted glasses must normally be removed. They should not be placed on top of the head for the photograph. A medical exception requires a signed note from a doctor.
Removing glasses can temporarily change how a person holds their face, especially when they cannot see the camera clearly without them. Set the camera position while wearing the glasses, then remove them immediately before taking the photograph. Ask the photographer to confirm your exact eye line.
Headphones, earbuds, and wireless hands-free devices must also be removed. Jewelry and facial piercings can remain as long as they do not hide or cast shadows across the face.
Hats and head coverings are generally not allowed unless worn for documented religious or medical reasons. When an approved head covering is worn, the full face must remain visible and free from shadows. The current rules also specify a solid color without patterns or small holes. Supporting documentation may be required for applications submitted in person or by mail.
These restrictions simplify the image and place attention where it belongs: on the face.
Take Several Original Frames
Taking multiple photographs is not the same as digitally altering one photograph. Capture several original frames and choose the one with the best focus, expression, eye position, and lighting. (New passport system will make taking at-home photos easier)
Between frames, check for practical issues:
- Is the face evenly illuminated without shadows?
- Are both eyes open, visible, and directed toward the lens?
- Is the mouth closed?
- Is the head straight and centered?
- Does the background appear plain and evenly white or off-white?
- Is the entire head visible?
- Is the photograph sharp at full size?
- Does the skin tone look natural rather than orange, blue, gray, or washed out?
Review the images on a larger screen when possible. A photograph may look sharp on a phone display but reveal blur, focus problems, or compression artifacts when enlarged.
Choose the best original frame. Do not smooth skin, brighten the eyes, reshape the face, remove stray hairs, replace the background, correct red eye, whiten teeth, or use an AI enhancement tool. If something looks wrong, correct the lighting, clothing, expression, or camera position and take another photograph.
The State Department explicitly states that it checks images for AI use and will not accept photographs created or altered with artificial intelligence.
Understand the Difference Between Cropping and Retouching
Cropping is permitted when it is used to place the head correctly within the required square composition. Retouching is not permitted when it changes appearance, facial outlines, background edges, skin, eyes, or other identifying features.
For printed applications, the final image must measure 2 by 2 inches. The official State Department photo tool can help crop a photograph for a paper application, but the agency notes that the tool does not determine whether the image quality or content will ultimately be accepted.
Online renewal follows a different workflow. Applicants upload a digital photograph, and the application system allows repositioning and cropping. Current online passport photo guidance accepts JPG, JPEG, PNG, HEIC, or HEIF files between 54 KB and 10 MB. The photograph must be the original digital file rather than a scan or photograph of a printed image.
Do not stretch or compress the image to make it square. That can subtly alter facial proportions and is listed among unacceptable digital changes. Crop while preserving the original aspect and proportions.
Know When a Professional Photo Service Is Worth It
Taking a passport photograph at home can work when you have enough space, even lighting, a plain background, and someone who can operate the camera carefully.
A professional passport-photo service may be the better choice when your home has limited natural light, textured walls, strong color casts, or insufficient distance between the camera and background. It can also reduce uncertainty when photographing young children or preparing an application close to a travel deadline.

Professional service does not automatically guarantee a flattering result. Ask to see the image before it is printed, and request another frame if your eyes are partly closed, the expression looks unusually tense, or the lighting creates a visible shadow.
A useful photographer should prioritize compliance first and then help with posture, clothing placement, focus, and even lighting. They should not promise beauty retouching, face reshaping, AI enhancement, or digital replacement of the background.
A Good Passport Photo Should Still Look Like You
Looking better in a passport photograph does not require looking younger, thinner, smoother, or more glamorous. It requires making the camera represent your actual appearance clearly and fairly.
Soft frontal light can reduce harsh shadows. Greater camera distance can prevent facial distortion. Eye-level framing can preserve natural proportions. A contrasting shirt can separate the shoulders from the background. Neat hair and controlled shine can help the face remain readable. A relaxed, closed-mouth expression can look composed without becoming theatrical.
None of these techniques changes identity. They simply remove photographic problems that make people look less like themselves.
The finished image should satisfy two standards at once: it must meet the government’s identification requirements, and it should be a photograph you can live with for the life of the passport. The best way to reach both goals is to improve the scene, lighting, posture, and timing—not the pixels afterward.